I moved in October 2012, just in time for the Minnesota winter and hands down the number one question I am asked is: "Are you staying warm in there?"
I don't know what people think I'm doing out here, shivering over a single candle? The answer is YES, of course! It's 117 square feet with cutting edge insulation tech. I have one built in electric heater in the bathroom, and one ceramic element space heater. I have it set to 60 during the day and 55 at night because it's always warmer in the loft. It's no trouble at all keeping it warm.
The biggest problem so far is keeping the floor clean. Muck boots covered in snow make a mess every single day. Take two steps in the door and you're halfway through my kitchen/living room. The closets are too small for my boot tray so I've improvised with a plastic place mat and rags underneath. I also have a rag that I use to wipe up the floor after I come in. It's worked great so far, but I'm looking forward to spring when I can build the porch and keep my boots out there.
Monday, March 11, 2013
Monday, February 11, 2013
Textiles
It took a few days of shopping to figure out what I wanted for my curtains and built in bench. I know what I wanted for style/functionality though. Simple blackout curtains that fit inside the window frame. We ended up making them ourselves. It was actually pretty easy and I'm happy with them.
I stitched little loops on them at at the corners so to hang them we looped them onto little hooks set inside the frame. A second hook/loop combo is used to hang them up during the day.


I stitched little loops on them at at the corners so to hang them we looped them onto little hooks set inside the frame. A second hook/loop combo is used to hang them up during the day.
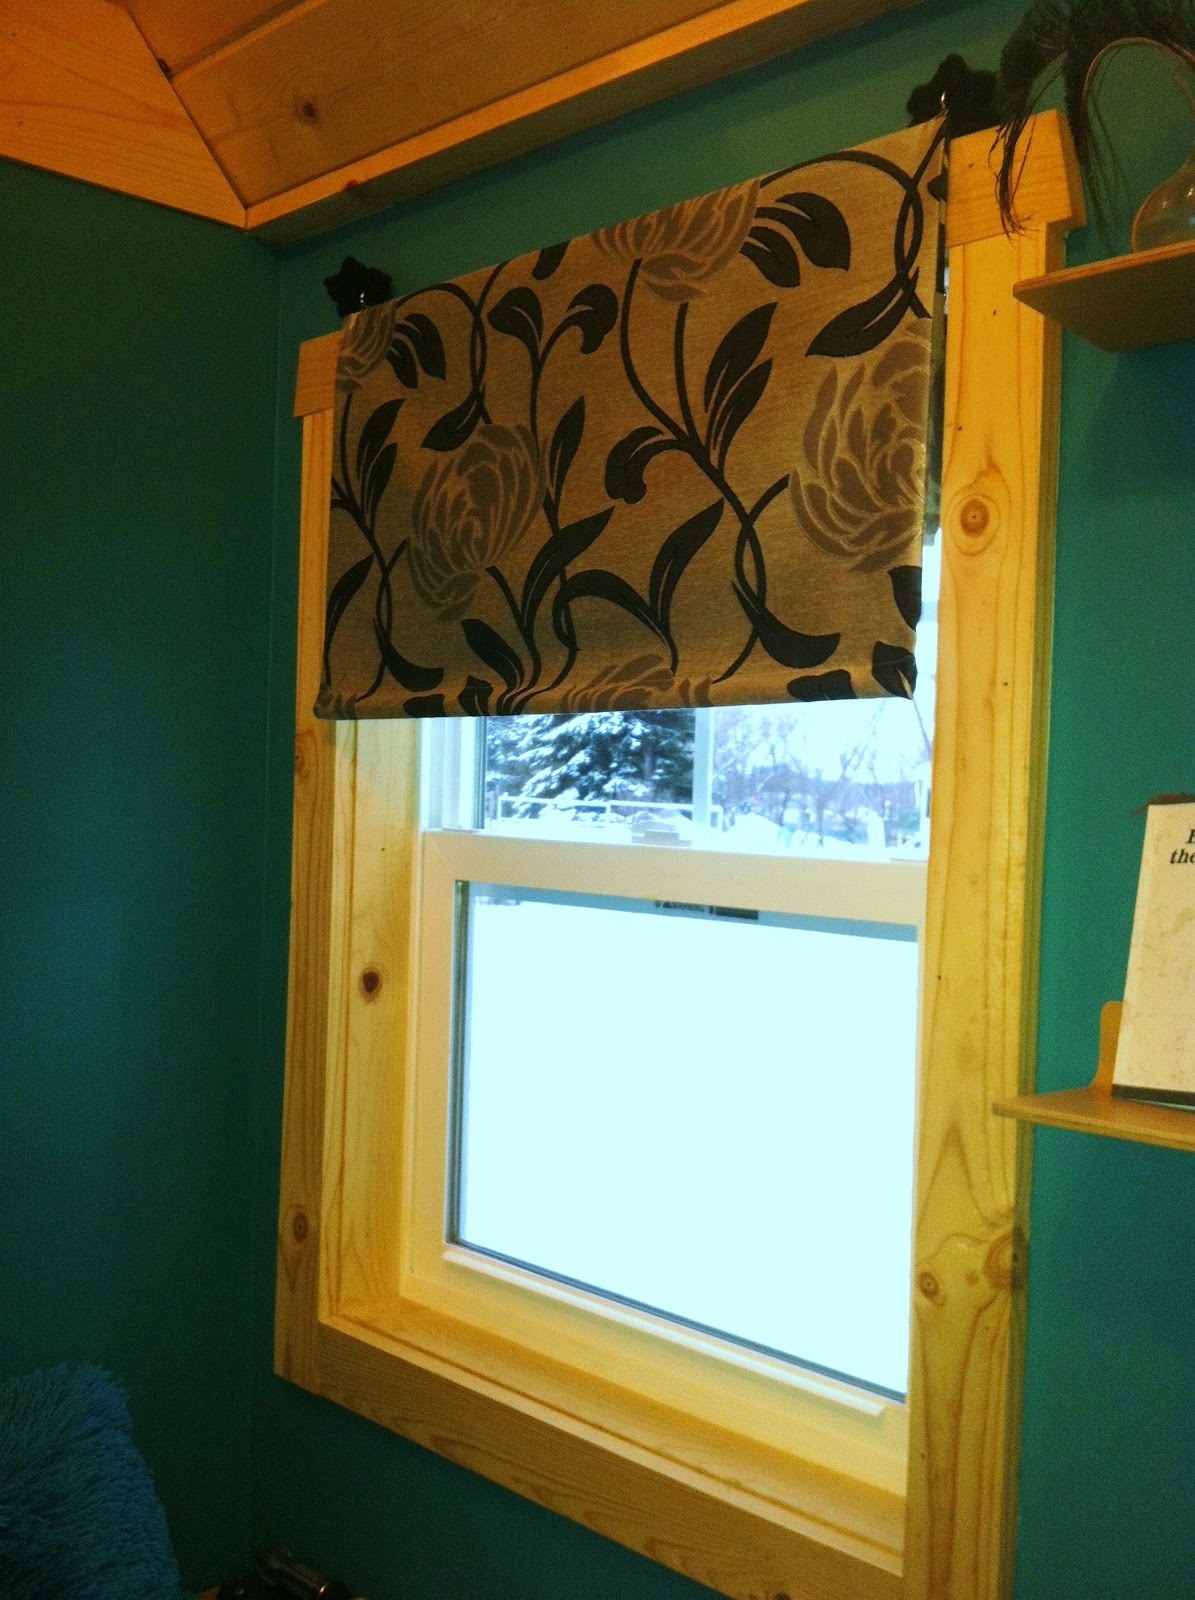
You can find a pic of them down in the last post.

My Bedroom

My bed linens are from Target. LOVE my bedroom!

I switched it up a little in the bathroom and utility room with this fabric. I realized a month after I moved in that it's the same pattern as the mirror in my bedroom and my doormat. I guess I like the pattern!

My lovely built in bench with its new covering.
Next Up: Life in a tiny house
Monday, January 28, 2013
Details
Storage and whatnot was fun to work out.

 My lovely wine glass holder, from Ikea. I don't totally love the shelf, think it's too big for the space. It was made for the microwave but I didn't like it up there, too big! So we moved it to the cupboard.
 Closet storage, custom made, with fabric boxes from Target. All of my jeans and casual clothes are rolled up in them. Rolling works better for this situation, you can look through them without messing everything up.
 Second closet for skirts, dresses, jackets etc...
 ...and behind the dresses is shoe storage!
 My bookshelf in my utility room.
 Shelves and wine bottle rack, from Ikea.
 CD rack re purposed as low profile knick-nack shelf. Perfect for blocking the view of the water heater.

Bathroom storage, custom made. Boxes from Target.
 Storage loft with boxes from Ikea. There were a couple of things (mostly books) I had to get rid of because of not having as much room but nothing I miss! Even have room for all my hobby stuff.
 Bed stand storage from Michaels, it's a scrapbook organizer. Got two of them for 40% off each with coupons! And the cute little light is from Ikea.
Next Up: Textiles!

Cubbies courtesy of Target. The mirror ended up being to small so I moved it to my loft and got a bigger one, also from Target.
Bathroom storage, custom made. Boxes from Target.
Next Up: Textiles!
Sleeping Loft
The ceiling in the sleeping loft was a bit of a nightmare. But we worked it out.
SO MANY ANGLES!
 We had to put a facing board up to bridge the gap between the studs and give us something to nail onto.
 And the thin pieces on each ridge had to be custom cut. Lots of trial and error.
 But I think it turned out really nice!

SO MANY ANGLES!
Next Up: Details
Wednesday, January 23, 2013
Kitchen
The construction is almost finished, oh so close to moving in!
+-+Copy.JPG)
.JPG) From 'under construction' to 'completed'! It seems I don't have any in between pics.
From 'under construction' to 'completed'! It seems I don't have any in between pics.
It took some figuring to get the plumbing, wiring, and propane fitted with the drawers and stuff, but worked out in the end. The 2 burner propane cook top fits perfectly above the refrigerator. The fridge does stick out a bit because of the wheel well, but it hasn't bothered me. It's about 4 cubit feet, I think, and has more than enough room for my purposes. The freezer section is tiny, but I have access to a chest freezer on the property so it works out.
The only thing I have yet to do is add spice racks.
Up next: Loft Ceiling (this was a huge pain!)
+-+Copy.JPG)
My shiny new microwave! I was going to get a toaster oven too since I won't have an actual oven but decided to put it off and try to get along with just a toaster to see if I really miss it. So far I haven't!
.JPG)
It took some figuring to get the plumbing, wiring, and propane fitted with the drawers and stuff, but worked out in the end. The 2 burner propane cook top fits perfectly above the refrigerator. The fridge does stick out a bit because of the wheel well, but it hasn't bothered me. It's about 4 cubit feet, I think, and has more than enough room for my purposes. The freezer section is tiny, but I have access to a chest freezer on the property so it works out.
The only thing I have yet to do is add spice racks.
Up next: Loft Ceiling (this was a huge pain!)
Lighting
This actually came before painting...oh well.
 My lovely little chandelier from Menards. It was on clearance and the last one left, love it! Flanked by halogen spots. There is another spot in the sleeping loft and one in the storage loft, so 4 in all; two on either side of the chandelier.
.JPG) Bathroom lighting, once again courtesy of Menards. The dome was super cheap, $10-$15? Can't remember. and the 2 puck lights were $9. each.
Bathroom lighting, once again courtesy of Menards. The dome was super cheap, $10-$15? Can't remember. and the 2 puck lights were $9. each.
+-+Copy.JPG)
Next Up: Kitchen

.JPG)
+-+Copy.JPG)
Next Up: Kitchen
Thursday, January 17, 2013
Paint
I actually enjoy painting. I've helped various friends with their houses/apartments and even helped pick out colors. Which is why it was so shocking how I panicked when I had to pick out my own paint. I was envisioning a country kitchen kind of style, with pale yellow, blue and white...turned out a bit more intense than I intended.


+-+Copy.JPG)

Goes with my TARDIS blue door though!


And I actually don't mind it with the natural pine, looks kinda nice.


Here's a sneak peek of my kitchen.


+-+Copy.JPG)
The Bathroom is the Perfect shade of yellow though! Had to stand inside the shower to get even this shot. I seriously need a fish eye lens or something...
Saturday, January 5, 2013
Floors and Trim
I loved this part. Made it feel like it was really almost finished! I should say, first we did the storage loft floor which was super easy and fast. Think we got it done in a little over an hour, that includes time spent setting up the saw.
.JPG)
First you staple down some foam stuff so it's cushy and doesn't squeak. Then you just follow the directions on the box. It's amazing how easy things are when you just take the time to read the directions instead of trying to figure it out intuitively. Since this is a 'floating floor you have to leave 1/2'' around the sides for it to move otherwise it buckles. The gap is covered by floor and crown molding.

.JPG)
Ta-da!

Subscribe to:
Comments (Atom)